What changes with Battery Video Doorbell Pro ring doorbell installation
The latest Battery Video Doorbell Pro changes more than the marketing suggests. During ring doorbell installation you notice the new mount, the revised battery compartment, and the sharper 4K video sensor long before you open the ring app. This is still a familiar doorbell for existing Ring users, but the device behaves differently enough that your first setup step deserves more planning than with older powered doorbells.
The mount is taller and slightly narrower than the first generation doorbell pro mount, which means the old screw holes rarely line up and the arrow printed on the new bracket sits a few millimetres higher. If you are upgrading from an existing doorbell or from another ring device, expect to patch at least one hole and possibly repaint a small rectangle of wall around the new installation zone. That sounds minor, yet the first day of installing doorbell hardware is when most people decide whether they will keep or return a video doorbell, so these small frictions matter.
Ring now leans harder into battery powered flexibility, even on a model that can also use wired power from an existing doorbell transformer. You can run the device entirely from the removable doorbell battery, or you can connect it to low voltage power and treat the battery as a backup that you only remove when you need to charge battery packs on a longer cycle. Either way, the ring doorbell feels less like a fixed appliance and more like a modular ring device that you can set ring up, move, and adapt as your front door changes.
New mount and corner kit: getting alignment right the first time
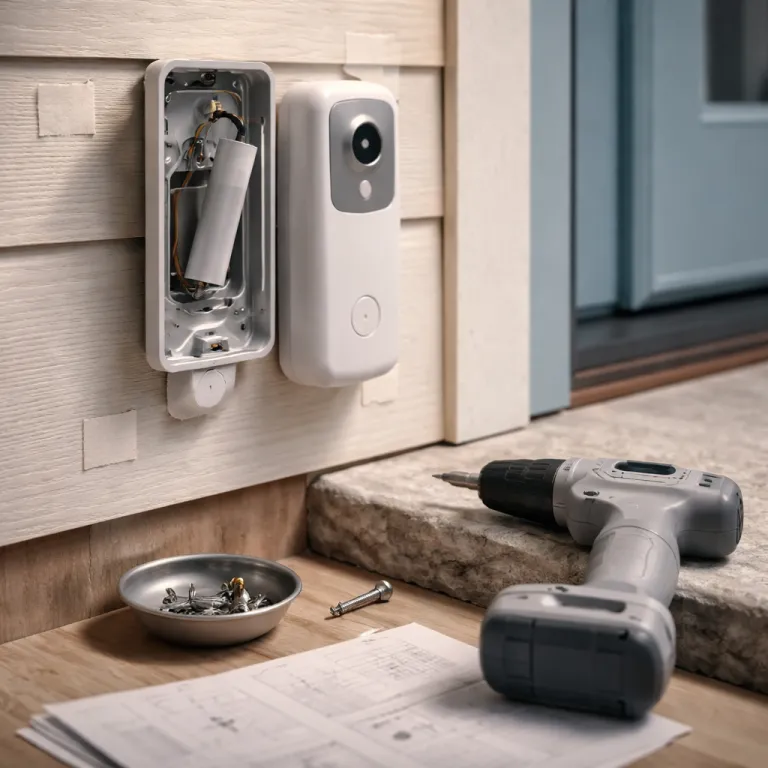
The most visible change during ring doorbell installation is the redesigned mount and corner kit that ships with the Battery Video Doorbell Pro. The bracket now uses a slimmer profile with a deeper cable channel, and the included corner kit wedges are stiffer, which helps the device sit flush but makes micro adjustments trickier once the screws bite into brick or render. If you rush this step, the 4K video sensor will faithfully capture a beautifully sharp view of your neighbour’s hedge instead of your own doorstep.
Before you drill, hold the mount at eye level and follow the small arrow icon that indicates the top of the bracket, then stand back three or four metres to judge the frame. This is the moment to learn how far the video doorbell sees vertically, because the higher resolution exaggerates even a two degree tilt and can cut off feet or faces in the recorded video. If you need more tilt, use the thicker corner kit wedge behind the mount, then mark the screw holes with a pencil rather than committing the first time with a power drill.
Upgraders coming from older doorbells often try to reuse the previous adhesive pads or wall plugs, but the new mount footprint rarely matches the old doorbells exactly. Peel away any adhesive, clean the surface with isopropyl alcohol, and only then add fresh tape or anchors so the ring device does not sag over time. For a detailed visual walkthrough on how to install a doorbell camera for a safer front door, you can consult a dedicated installation guide that shows each step connecting the bracket, the corner kit, and the chime wiring in context.
Battery compartment redesign and power choices for daily use
The Battery Video Doorbell Pro introduces a new battery compartment that finally feels designed for people who swap packs regularly. Instead of fighting a stiff clip, you press a recessed icon shaped latch, slide the doorbell battery down, and the device releases it with a controlled click that avoids dropping it onto stone steps. That small mechanical change turns a fiddly chore into a ten second routine, which matters when you manage several powered doorbells around a larger property.
If you run the ring doorbell as a fully battery powered unit, plan your charge battery cycle around your wifi strength and motion settings, because high resolution video and frequent events will drain the pack faster. Many users with an existing doorbell transformer choose to connect low voltage power so the device trickle charges the battery, reducing the number of times they need to tap set in the ring app to snooze alerts while the pack charges indoors. When you first set device options, think about whether you prefer fewer, richer video clips or more frequent, shorter recordings, because that trade off directly affects both battery life and how often your doorbell ring events appear in the app.
Wired users should still treat the battery as a consumable part of the setup rather than an afterthought. If the transformer fails or someone accidentally flips the breaker, the battery keeps the doorbell, the chime, and the wifi connection alive long enough for you to notice in the ring app. For a sense of how this plays out over months, long term reviews of living with a battery powered ring device show that a well tuned setup will make the doorbell fade into the background, becoming not the spec sheet, but the doorbell you forget is even there.
4K sensor alignment, wifi tuning, and app setup quirks
The jump to a 4K sensor with 10x zoom and 3D Motion Radar makes alignment during ring doorbell installation far less forgiving. When you first power the device and open the ring app, resist the urge to rush through each setup step, because the preview video is your best tool for catching small framing errors. A few minutes spent here will save you from re drilling or re mounting once you notice that visitors’ faces sit at the very top edge of the frame.
During setup, the app will prompt you to connect the doorbell to wifi, name the ring device, and add it to a location, and this is where many upgraders trip over subtle changes in the interface. Look for the small plus icon to add new doorbells, then follow the on screen arrow prompts that guide you through scanning the QR code and confirming the chime settings. When you reach the network screen, choose the closest 2,4 GHz band if your router separates bands, because walls and brickwork often weaken 5 GHz signals enough to cause video buffering or delayed doorbell ring notifications.
Once online, spend time in the motion settings rather than accepting the defaults. Use the Bird’s Eye View map to learn where motion paths cross your property line, then adjust zones so that the video doorbell records people approaching your door but ignores cars turning at the end of the street. If you integrate with Alexa or other smart home systems, double check that each app tap you make to link accounts respects the terms of service you agreed to, especially if you share access with family members who will also tap set options on their own phones.
Adhesive retention, professional installation, and a first day checklist
Replacing an older ring doorbell or another brand’s device often exposes a messy patchwork of adhesive pads, screw holes, and faded paint. The new mount on the Battery Video Doorbell Pro uses a slightly different footprint, so any leftover adhesive from previous doorbells can prevent the bracket from sitting flat and may twist the device just enough to skew the 4K video. Take the time to scrape away old pads, fill unused holes, and repaint a small area before you attempt the final installation.
If you are not comfortable working near mains wiring or your existing doorbell transformer, professional installation remains a sensible option, especially when you want to integrate multiple powered doorbells, a mechanical chime, and perhaps a smart lock. A qualified installer will handle the step connecting low voltage power, confirm that the chime and transformer match the doorbell pro requirements, and test that the ring app shows a stable video feed on all household phones. Even if you outsource the wiring, keep control of the ring account yourself so that you can set ring preferences, manage terms of service acceptance, and decide who can app tap to answer calls.
On day one, run through a simple checklist before you recycle the packaging. Confirm that the doorbell ring sounds clearly on the indoor chime, that the ring app sends notifications within a second or two, and that the video looks level with no odd tilts from a misused corner kit. Then test the battery removal, verify that you can charge battery packs without losing wifi connection, and finally check that every set device option you chose still makes sense once you have watched a few real world clips of visitors, deliveries, and late night motion.
FAQ
Is the new Battery Video Doorbell Pro compatible with my existing doorbell wiring ?
The Battery Video Doorbell Pro can work as a fully battery powered unit or connect to most low voltage existing doorbell transformers between 8 and 24 volts AC. If your current doorbell pro or mechanical chime already runs on standard low voltage wiring, a straightforward ring doorbell installation usually only requires moving the two low voltage wires to the new mount. When in doubt, turn off power at the breaker and consult a qualified electrician or use professional installation services.
Do I need the included corner kit for my ring doorbell installation ?
You only need the corner kit if your door frame or wall forces the doorbell to face away from the approach path to your door. The 4K video sensor and 3D Motion Radar work best when the device looks slightly down and across your entryway, which the angled wedges help achieve on narrow frames or side walls. Test the view in the ring app before drilling, and only add the corner kit if you see too much of a side wall or too little of the path.
How often will I need to charge the doorbell battery on the Battery Video Doorbell Pro ?
Battery life depends heavily on wifi strength, motion frequency, and video quality settings. In a typical suburban setup with moderate motion and default video settings, many users charge battery packs every one to three months, while those with heavy traffic or weak wifi may need more frequent charging. Wiring the device to an existing doorbell transformer can reduce or eliminate manual charging by keeping the battery topped up.
Can I move my Battery Video Doorbell Pro to a new home easily ?
The new mount and battery powered design make relocation straightforward compared with older wired only doorbells. You can remove the device by loosening the security screw, sliding it off the bracket, and then either leaving the mount in place or patching the holes before you move. At the new property, you simply install a fresh mount, connect to wifi through the ring app, and set device options again for the new layout.
What should I check in the ring app after finishing installation ?
After completing ring doorbell installation, open the ring app and confirm that live view loads quickly, that motion alerts arrive promptly, and that the chime rings reliably when you press the button. Then review motion zones, privacy zones, and notification preferences so that the video doorbell records only what you need and respects neighbours’ privacy. Finally, verify that all shared users have appropriate access and that everyone understands the terms of service associated with storing and sharing recorded video.