Understanding When to Reset Your Ring Doorbell
At times, you may encounter issues with your Ring Video Doorbell that necessitate a reset. Knowing when to perform a reset is crucial for ensuring your device operates smoothly. There are several scenarios where a reset might be appropriate, and understanding these helps you make informed decisions about your smart home's security setup.
Recognizing When Your Doorbell Needs a Reset
Your Ring Doorbell is designed to provide reliable video monitoring, but like any tech device, it can sometimes experience hiccups. You might consider a reset if your doorbell is consistently unresponsive or if you're encountering persistent connectivity issues. These situations are a clear indicator that a reset could resolve underlying problems.
Addressing Persistent Technical Issues
If your Ring camera isn't recording properly or the video feed is erratic, resetting might help restore it to optimal performance. Similarly, if the doorbell won't connect to Wi-Fi despite multiple attempts, these are signs there might be underlying issues that a reset can often remedy.
Preparing for a New Setup or Sale
Suppose you're planning to remove the device from your account completely or setting up the Ring Doorbell in a new location. In that case, a factory reset is a standard procedure to ensure a clean slate for the new setup process. For more guidance, consider checking how to set up your Ring Video Doorbell effortlessly.
Preparing for the Reset Process
Getting Ready for the Ring Doorbell Reset
Before diving into the process of resetting your Ring Doorbell, preparation is key. Whether you're experiencing persistent issues or simply conducting routine maintenance, having a plan will ensure a smooth reset and a quick return to full functionality. Firstly, it's essential to understand why you might need a factory reset. This process clears all the device's settings, which might be necessary if you're selling your Ring Doorbell or if you're encountering issues that cannot be resolved through simpler troubleshooting. To start, gather the necessary tools and information:- App Access: You will need the Ring app on your smartphone. Ensure it's updated to the latest version to avoid compatibility issues.
- Network Credentials: Have your Wi-Fi details handy, as you'll need to reconnect your doorbell after resetting.
- Setup Button Familiarity: Know where the setup button is located on your device, often at the back or under the faceplate.
Step-by-Step Instructions for Resetting
Executing the Reset: Your Guide
To effectively initiate the reset process for your Ring doorbell, you need to focus on specific steps to ensure smooth execution and prevent any inadvertent errors. This phase is crucial for restoring factory settings and making your video doorbell ready for reconfiguration.- Locate the Reset Button: First, identify the reset button on your Ring device. For most models, such as the Ring Video Doorbell, you'll find the setup button prominently crafted into the design, often on the side or the back of the doorbell.
- Press and Hold the Reset Button: Using appropriate pressure, press and hold the reset button. It's usually necessary to maintain your hold for about 15 to 20 seconds. During this time, you'll notice a flashing light indicating the doorbell will begin the reset process.
- Watch for the Light Indicator: When the light will start to spin or flash, this signals that the device has started resetting to its factory settings. This visual cue is pivotal in confirming the reset action.
- Device Will Automatically Restart: Once the reset is complete, the light will eventually become steady or turn off momentarily. This denotes that your Ring doorbell has restarted successfully.
- Remove the Device from Ring App: If at any point you need to remove the device from your Ring app, do so through the settings menu on the app interface by selecting "Remove Device." This ensures it is fully ready for a fresh setup.
Reconnecting Your Ring Doorbell to Wi-Fi
Re-establishing the Link to Your Network
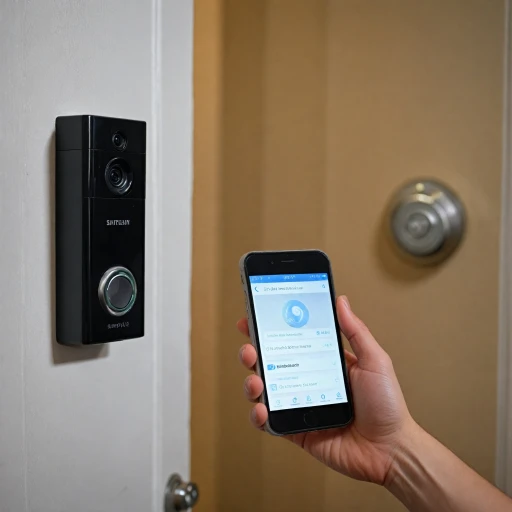
After you have completed the reset process, the next step involves reconnecting your Ring doorbell to your Wi-Fi network. This crucial step ensures your device can continue to provide surveillance and communication through its video and audio functionalities. Here’s how to swiftly re-establish the connection:- Open the Ring App: Start by launching the Ring app on your smartphone or tablet. The app is the hub for all interactions with your Ring doorbell, whether it's checking recordings or altering settings.
- Enter Setup Mode: With your doorbell reset to factory settings, press and hold the setup button until the light ring on the device begins to spin or flash, indicating it’s ready to connect.
- Find the Device in the App: In the Ring app, locate the option to add a new device. Follow the steps provided to identify and select your specific Ring doorbell model.
- Connect to Wi-Fi: The app will prompt you to connect to a Wi-Fi network. Select your home network from the list, input your password, and tap confirm. The light on your Ring doorbell will indicate the connection status; a solid light means it’s connected successfully.
- Finalize Setup: Once the device light confirms a successful connection, check the camera feed in the app to ensure everything is working properly. Your Ring video doorbell is now operational and ready for use.
Troubleshooting Common Reset Issues
Troubleshooting Potential Reset Hurdles
When undertaking the process of resetting your video doorbell, it's not uncommon to encounter certain obstacles. Here's a guide to help you navigate these issues effectively:- Unresponsive Reset Button: If your Ring Doorbell reset button does not respond when pressed, ensure you're holding the button for the recommended number of seconds. The button can become slightly recessed over time, so apply steady pressure.
- Light Will Not Indicate Setup Mode: After pressing the reset button, the light on the doorbell should flash to signal it's in setup mode. If the light remains off, double-check the device’s battery or power source and make sure everything is properly connected.
- Device Not Reconnecting to Network: In some cases, after a reset, the doorbell will not automatically reconnect to Wi-Fi. Use the Ring app and follow steps for adding your device back to your network. Ensure you have the correct Wi-Fi credentials ready.
- App Cannot Find Device: If the app fails to recognize the doorbell or if you're unable to complete the re-setup, try using the app tap feature to "Remove Device" and start the process afresh. Sometimes a simple restart of the app or device may resolve the issue.
Maintaining Your Ring Doorbell Post-Reset
Ensuring Optimal Functionality of Your Ring Doorbell After a Reset
Once you've completed the resetting of your Ring doorbell, maintaining its functionality is crucial to ensure consistent performance. Here are several steps you can follow:- Regularly Update the Ring App: Make sure that your ring app is up-to-date. Updates often include fixes and new features that can enhance your device's performance.
- Monitor Wi-Fi Connectivity: Post-reset, it's essential to keep your ring doorbell connected to a stable Wi-Fi network. Weak or intermittent connections can impact both live video quality and the device's responsiveness.
- Check Power Sources: For models like the Ring Doorbell Pro, ensure that the power supply is consistent. Issues with power can lead to unexpected resets or performance degradation.
- Customize Settings Appropriately: Don’t forget to reconfigure any personal settings lost during the factory reset. This includes adjusting the video quality, notifications, and motion detection sensitivity to suit your needs.
- Regularly Test Device Functions: Conduct periodic checks to ensure features like the video camera and two-way communication are operating smoothly. This helps in identifying potential issues early.
- Secure the Device: Ensure the security of your Ring device by periodically checking for any firmware updates and enabling two-factor authentication for added security in the ring app.
