Understanding Your Ring Doorbell Model
Identifying Your Ring Video Doorbell Model
Understanding your specific Ring video doorbell model is crucial to a successful setup. With multiple options available, each device may offer distinct features such as battery power, or a wired connection. Familiarizing yourself with your model will streamline installation.Differentiating Between Battery Powered and Wired Devices
- Battery Powered Doorbells: These models are easy to install without existing wiring and provide flexibility in placement. However, they require recharging or battery replacement periodically.
- Wired Doorbells: Some options, often referred to as "pro" models, connect directly to your home's electrical system. This provides continuous power but demands existing doorbell wiring.
Assuring Compatibility with Your Home
Consider whether your home currently supports a wired setup or if you’ll need to rely on a battery doorbell. It's also helpful to confirm compatibility with your WiFi network, ensuring the wifi signal reaches your doorbell's location. To assist in selecting the most suitable model, consult our comprehensive guide to using your Ring video doorbell, which offers in-depth insights into various features. Understanding model-specific details will enhance connection to your existing setup and app functionality. It’s an essential step before moving on to gathering necessary tools for installation.Gathering Necessary Tools and Equipment
Gather Your Tools for a Smooth Installation
Before diving into the installation process of your new Ring Doorbell, it's crucial to gather all the necessary tools and equipment. This will help streamline the setup process and ensure everything goes smoothly. Here’s what you’ll need:
- Mounting Bracket: Typically included with your device. It ensures the doorbell sits securely.
- Screwdriver: For securing the bracket and doorbell. A phillips head is commonly required.
- Screws and Anchors: Usually provided in the package to attach the bracket to various surfaces.
- Level Tool: Helps in perfectly aligning the video doorbell.
- Drill: Needed if you opt for a wired setup, especially on a masonry surface.
- Batteries: Relevant for battery-powered video doorbells. Fully charge them before beginning.
Ensuring all these items are on hand can significantly ease the installation. It is worth mentioning that installation steps differ slightly based on the model of your Ring Video Doorbell. Whether you're using the Ring Pro, or a battery doorbell, check specific guidelines in your manual.
As your tools are ready, begin the step-by-step installation process by selecting the perfect location outside your home. Remember, clear views and strong wifi network signals are essential for optimal performance. Explore more on effective setups here.
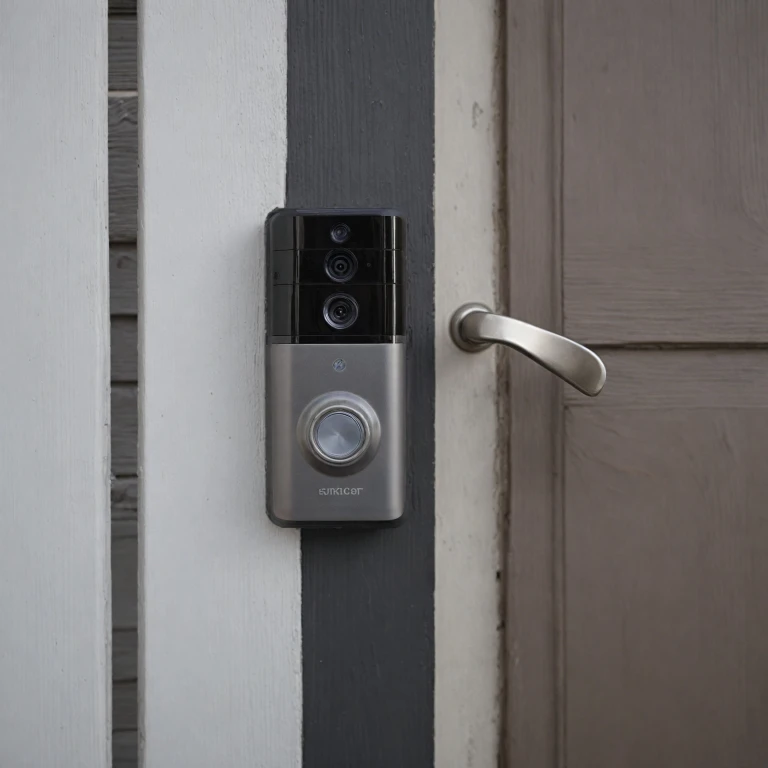
Installing the Ring Doorbell Hardware
Mounting Your Ring Doorbell into Place
Once you've gathered the essential tools and have a clear understanding of your Ring doorbell model, it's time to start the installation process. Whether you're working with a battery-powered video doorbell or a wired doorbell pro, the following steps will help ensure a secure and functioning setup.
First, determine whether you're replacing an existing doorbell or installing in a new spot. If it’s the former, remove the original setup but keep the wires intact.
- Using the Level Tool: Most Ring video doorbells come with a built-in level tool. It helps in aligning the device perfectly. Ensure that your video doorbell is level by checking the placement.
- Position the Mounting Bracket: Hold the mounting bracket against the wall. Use a pencil to mark the screw holes. Ensure the bracket is placed at the right height for optimal video coverage.
- Drill Holes for the Screws: For hard surfaces like brick or concrete, utilize the provided anchors. If you're drilling into wood or a similar surface, you can screw directly.
- Screw in the Bracket: Securely attach the mounting bracket using the screws provided. Ensure it’s tightly fastened to support the ring device.
For superior insights on how to best set up your ring doorbell pro based on its features, further reading can be beneficial.
After the bracket is mounted, affix your Ring doorbell to it. If it's a battery doorbell, ensure the battery is fully charged. If it's a wired doorbell, connect the wires to the back of the device before attaching it to the bracket. Finally, secure your device with the provided screws.
With the hardware successfully installed, the next logical step involves connecting your ring doorbell to Wi-Fi and power, to ensure it communicates seamlessly with the Ring app for a complete experience.
Connecting to Wi-Fi and Power
Seamlessly Linking Your Ring Doorbell to Wi-Fi and Power
To ensure your Ring doorbell functions optimally, establishing a stable connection to your Wi-Fi network and a reliable power source is a crucial step. Understanding these connections will not only help in smooth doorbell operations but also enhance the overall performance of your Ring video doorbells. Firstly, determine if your model is battery powered or requires a wired connection. If you have a battery doorbell, ensure the battery is fully charged before proceeding. For wired variants, double-check that your doorbell’s power supply is compatible with your existing doorbell setup.- Begin by accessing the Ring app on your device. This app acts as the nerve center, coordinating all functions between the doorbell and your control device, like your smartphone or tablet.
- Inside the app, navigate to the setup section where you will find instructions to connect your doorbell to your Wi-Fi network. Choose your network from the list and enter the password when prompted. This connection facilitates the transmission of video footage and alerts to your device.
- During this process, pay attention to the lights on your Ring device. These indicate the doorbell’s status. A solid white light, for example, often signifies a successful connection.
- If connecting a wired doorbell, ensure all wires are securely connected. Use the level tool to position the mounting bracket perfectly and employ the included mounting screws. Make sure to shut off power to avoid any mishaps during the installation.
- After you have connected to Wi-Fi and ensured proper power setup, test the device by pressing the doorbell button. The Ring app should alert you instantly, confirming that your doorbell ring is effectively signaling your device.
Setting Up the Ring App
Launching and Navigating the Ring Application
Once your Ring doorbell hardware is securely in place and connected, it's time to move on to the digital setup with the Ring app. Begin by downloading the app from your smartphone's app store, ensuring it is compatible with your device's operating system. Upon opening the app, you'll be prompted to create a Ring account or log in if you already have one.
Adding Your Device
After logging into the app, locate the “Set Up a Device” option on the interface. This step will involve selecting 'Doorbells' from the list of devices. Make sure your video doorbell is powered on and nearby to initiate the connection process.
Syncing the Ring Doorbell with Your Wi-Fi
The next step involves connecting your ring video doorbell to your Wi-Fi network. Follow the on-screen instructions to link the doorbell to the available network. It is crucial to have a reliable Wi-Fi connection to ensure seamless operation of your new ring device.
Configuring Settings
Once successfully connected, you can customize various settings to suit your preferences. Adjust the motion detection sensitivity, set up notifications, and explore additional features your doorbell pro or battery-powered device may offer.
Integrating with Additional Accessories
If you've equipped your setup with additional accessories like a chime or Ring Alarm, follow prompts in the app to connect these devices. Ensure any accessory such as a wired chime is properly installed according to the provided instructions.
Finishing Touches
Lastly, perform a quick review of your settings and test the device. Look for a steady light on the doorbell to confirm successful installation. If issues arise, the app provides troubleshooting steps to refine the setup.
Testing and Troubleshooting
Final Checks and Making Sure Everything Functions
After completing the installation and connecting your device to the Wi-Fi network, it's imperative to test your ring video doorbell thoroughly. This will ensure it operates seamlessly and integrates well with your setup.- Power and Connectivity: Verify that your ring doorbell has power. If it's a battery powered model, ensure the battery is fully charged and correctly installed. Check the light indicator on the ring device to confirm connectivity. A steady light usually indicates that everything is functioning as expected.
- App Integration: Open the Ring app on your smartphone and check for a live video feed from your video doorbell. This confirms that the doorbell is online and the camera is working. You can also test the two-way audio feature by speaking through the app.
- Testing the Chime: If you have installed a Ring Chime or Chime Pro, perform a test to ensure it activates when the doorbell button is pressed. If it doesn't, revisit your Wi-Fi settings in the app and make sure the chime is properly connected.
- Motion Detection: Adjust the motion detection settings in the app that best suit your requirements. Test by walking in front of the doorbell to confirm the motion sensor activates and sends alerts appropriately.
- Troubleshooting: In case of issues, verify the wiring for wired models or recheck the Wi-Fi connection settings. For persistent problems, refer to the troubleshooting section in the Ring app or consult online support resources.